Here it is, bitches. Since it seems I'm motivated again, I'm retooling my 350 for Morvahna. Yes, I understand that Morvi might not be the most competitive at 350 points, but I think this list will handle a lot and come back for more. These also include a lot of models that have a place in my heart and/or really deserve paint jobs because of their performances.
-----
^Morvahna the Autumnblade
Gnarlhorn Satyr
*Woldwyrd
Wolves of Orboros (6)
Wolves of Orboros Officer and Standard Bearer
Professor Viktor Pendrake
*Swamp Gobber Bellows Crew
-Army Points: 346/350
-----
The star denotes finished models. The little chevron denotes model(s)-in-progress. I'm cheating a little, but I'll be painting my entire unit of WoO with the UA, so there. :P
So who's with me? Lincoln, I'm looking at you!!! Challenge time! Trade Rob for Khador and let's do this...
Thursday, February 19, 2009

Monday, February 16, 2009
Morvahna in Ocean Blues
On to Morvahna. After my successes with my Swamp Gobs, I'm keeping up the momentum, loving the color scheme, and applying both to my favorite warlock.
Base Coat
*Skin - finding the right skin tone has been a challenge for me, but I think I like this one. It's a 50/50 blend of VMC Cork Brown and VGC Elf Skintone. It's even, it's healthy, it's youthful. Multiple layers, thinned with my normal mixture, is key.
*Cloak - on less important models, the deep blue-green color will be less pronounced. On Morvi, it's front and center. The entire cloak is painted in a nice even coat of RMS Deep Ocean.
*Clothing - keeping with blackclad theme, Morvi's long skirt and sleeves are painted in VMC Black Grey. I've painted all the jewelry and stones this color too, just to make detailing easier later.
*Under-corset - to drop the greys in there, this subtle bit of cloth, sticking out from under her armored corset, is coated in a layer of VMC London Grey.
*Hair - hair is going to be a rich series of browns with red highlights. So to start, we need a nice deep warm brown. VGC Charred Brown is layered on and into the whorls and curls.
*Metals - the corset, sword hilt and pommel, the disk-shaped cloak pin, and the crown are all painted with VMC Bronze. Later, the metal woven into her hair will be detailed with the same color.
*Sword Blade - this is easy; a nice even coat of a 50/50 mix of VMC Oily Steel and VMC Silver. Again, multiple thin layers are best. Later this will be highlighted up to a brightly honed steel.

Shading
*Wash Morvahna's hair and black clothing with P3 Armor Wash.
*Wash her cloak with the original color & VMC Matte Medium & P3 Coal Black.
*Once dry, wash the cloak again with more P3 Coal Black. Focus on recesses.
*The brass metals get a wash of GAFA Raw Umber and VMC Matte Medium.
*The silver metals wash with GAFA Payne's Grey and VMC Matte Medium.
*Once dry, follow with a deep recess wash on all metals with P3 Armor Wash.
*The shirt under her corset gets a wash of P3 Armor Wash.
*The deepest recesses of the cloak get a very thin wash of P3 Armor Wash.
*The skins get a wash of GW Devlan Mud thinned with water and VMC Matte Medium.

Highlighting
*Begin by reclaiming the original color on the black clothing. Then use the base coat mixed with RMS Leather White, progress up to a deep grey.
*Reclaim the color on the shirt under the corset. Then use the base coat mixed with RMS Leather White, progress up to a light grey. Highlight the edges in almost pure RMS Leather White.
*Lightly reclaim the brass areas on her corset, sword, head piece, and medallion. Then use the base coat mixed with RMS Honed Steel for a further highlight. Do a final highlight with the base and RMS Polished Silver.
*Reclaim the silver on the sword. Then use the base color mixed with RMS Honed Steel for a highlight. Mix in RMS Polished Silver for a final highlight.
...after over a two-month hiatus, I return...
*Paint the lip of the base with P3 Thamar Black. Paint the inside of the base with VGC Charred Brown. Now's a good time because I'm starting on the cloak soon, and I don't want to be painting brown near it after it's done.
*Reclaim the brown color (since I had it ready from above) on the hair with a light dry brushing to hit the high points. Add a drop of GAFA Burnt Sienna to the mix and highlight some more. Keep adding and highlighting. Add a little P3 Moldy Ochre for the highest edge. Then wash entire head in GW Red Ink. Then GW Devlan Mud. Then reclaim the burnt sienna/ochre hightlights on the upper light-hitting edges.
*Using a two-brush wet blending approach, highlight the upper areas of the cloak with straight RMS Deep Ocean, pulling the color down into the darker areas. After that dries, do the same on a smaller area with a 5:1 mix of RMS Deep Ocean and RMS Leather White. Proceed to a 5:2 mix. Then a 1:1 mix for the extreme edges. Then, to smooth it all out, wash the entire cloak with P3 Turquoise Ink and water in very thin layers.
*Reclaim the skin by using the original color. After that dries, begin highlighting with a 5:1 mix of the original color base and RMS Creamy Ivory. Proceed to a 5:2 mix, on smaller areas. That should be enough, but a 1:1 mix wouldn't hurt for extreme highlights. She's gonna be pale, folks. Use a bit of GW Devlan Mud to smooth transitions and reclaim any over-highlighted areas.


Detailing
*Paint the little curls on her cheeks with straight GAFA Burnt Sienna. Paint her lips and nails with a 1:2 mix of VMC Black Red and VMC Brown Rose. Highlight the lower lip with straight VMC Brown Rose.
*Paint the eyes standard. Black, then white, then black.
*Paint the hair "trap" with VMC Bronze, then a layer of 1:1 VMC Bronze and RMS Honed Steel.
*Create a glaze with 2:1:5 of VMC Black Red, VMC Brown Rose, and VGC Glaze Medium. Carefully paint this onto the upper eye lid, up to where the eyebrow will be. Use a 2:1 mix of VGC Charred Brown and GAFA Burnt Sienna and carefully trace the model's brow ridges.
*Basecoat all the stones hanging from her wrists and across her legs with GW Foundation Charadon Granite.
Basing
*Standard Circle basing scheme.
Total time: ~12 hrs
Base Coat
*Skin - finding the right skin tone has been a challenge for me, but I think I like this one. It's a 50/50 blend of VMC Cork Brown and VGC Elf Skintone. It's even, it's healthy, it's youthful. Multiple layers, thinned with my normal mixture, is key.
*Cloak - on less important models, the deep blue-green color will be less pronounced. On Morvi, it's front and center. The entire cloak is painted in a nice even coat of RMS Deep Ocean.
*Clothing - keeping with blackclad theme, Morvi's long skirt and sleeves are painted in VMC Black Grey. I've painted all the jewelry and stones this color too, just to make detailing easier later.
*Under-corset - to drop the greys in there, this subtle bit of cloth, sticking out from under her armored corset, is coated in a layer of VMC London Grey.
*Hair - hair is going to be a rich series of browns with red highlights. So to start, we need a nice deep warm brown. VGC Charred Brown is layered on and into the whorls and curls.
*Metals - the corset, sword hilt and pommel, the disk-shaped cloak pin, and the crown are all painted with VMC Bronze. Later, the metal woven into her hair will be detailed with the same color.
*Sword Blade - this is easy; a nice even coat of a 50/50 mix of VMC Oily Steel and VMC Silver. Again, multiple thin layers are best. Later this will be highlighted up to a brightly honed steel.

Shading
*Wash Morvahna's hair and black clothing with P3 Armor Wash.
*Wash her cloak with the original color & VMC Matte Medium & P3 Coal Black.
*Once dry, wash the cloak again with more P3 Coal Black. Focus on recesses.
*The brass metals get a wash of GAFA Raw Umber and VMC Matte Medium.
*The silver metals wash with GAFA Payne's Grey and VMC Matte Medium.
*Once dry, follow with a deep recess wash on all metals with P3 Armor Wash.
*The shirt under her corset gets a wash of P3 Armor Wash.
*The deepest recesses of the cloak get a very thin wash of P3 Armor Wash.
*The skins get a wash of GW Devlan Mud thinned with water and VMC Matte Medium.

Highlighting
*Begin by reclaiming the original color on the black clothing. Then use the base coat mixed with RMS Leather White, progress up to a deep grey.
*Reclaim the color on the shirt under the corset. Then use the base coat mixed with RMS Leather White, progress up to a light grey. Highlight the edges in almost pure RMS Leather White.
*Lightly reclaim the brass areas on her corset, sword, head piece, and medallion. Then use the base coat mixed with RMS Honed Steel for a further highlight. Do a final highlight with the base and RMS Polished Silver.
*Reclaim the silver on the sword. Then use the base color mixed with RMS Honed Steel for a highlight. Mix in RMS Polished Silver for a final highlight.
...after over a two-month hiatus, I return...
*Paint the lip of the base with P3 Thamar Black. Paint the inside of the base with VGC Charred Brown. Now's a good time because I'm starting on the cloak soon, and I don't want to be painting brown near it after it's done.
*Reclaim the brown color (since I had it ready from above) on the hair with a light dry brushing to hit the high points. Add a drop of GAFA Burnt Sienna to the mix and highlight some more. Keep adding and highlighting. Add a little P3 Moldy Ochre for the highest edge. Then wash entire head in GW Red Ink. Then GW Devlan Mud. Then reclaim the burnt sienna/ochre hightlights on the upper light-hitting edges.
*Using a two-brush wet blending approach, highlight the upper areas of the cloak with straight RMS Deep Ocean, pulling the color down into the darker areas. After that dries, do the same on a smaller area with a 5:1 mix of RMS Deep Ocean and RMS Leather White. Proceed to a 5:2 mix. Then a 1:1 mix for the extreme edges. Then, to smooth it all out, wash the entire cloak with P3 Turquoise Ink and water in very thin layers.
*Reclaim the skin by using the original color. After that dries, begin highlighting with a 5:1 mix of the original color base and RMS Creamy Ivory. Proceed to a 5:2 mix, on smaller areas. That should be enough, but a 1:1 mix wouldn't hurt for extreme highlights. She's gonna be pale, folks. Use a bit of GW Devlan Mud to smooth transitions and reclaim any over-highlighted areas.


Detailing
*Paint the little curls on her cheeks with straight GAFA Burnt Sienna. Paint her lips and nails with a 1:2 mix of VMC Black Red and VMC Brown Rose. Highlight the lower lip with straight VMC Brown Rose.
*Paint the eyes standard. Black, then white, then black.
*Paint the hair "trap" with VMC Bronze, then a layer of 1:1 VMC Bronze and RMS Honed Steel.
*Create a glaze with 2:1:5 of VMC Black Red, VMC Brown Rose, and VGC Glaze Medium. Carefully paint this onto the upper eye lid, up to where the eyebrow will be. Use a 2:1 mix of VGC Charred Brown and GAFA Burnt Sienna and carefully trace the model's brow ridges.
*Basecoat all the stones hanging from her wrists and across her legs with GW Foundation Charadon Granite.
Basing
*Standard Circle basing scheme.
Total time: ~12 hrs
Tuesday, February 3, 2009
Swamp Gobs Begin!
Ok... documentation time. These little buggers will serve as a template for my Circle Orboros warrior models. As of the base coat, it looks really good together.
 Base Coat
Start with a base of VMC Green Ochre on the skins. Shirts, pants, and handkerchief are a combination of VMC Black Grey and RMS Deep Ocean, alternating which colors are where on each model (e.g. pants and handkercheif are blue on one model, black-grey on the other). Cover the leggings, gloves, and hat in a coat of VMC London Grey. Leather bags and straps are a 50/50 blend of VGC Beasty Brown and RMS Dark Shadow (to cut the red tone). Woods on the bellows pump is a 50/50 mix of VGC Charred Brown and RMS Dark Shadow (again to cut the red tone). Cover the tubes and pipes, and the inside of the tank, in VMC Oily Steel. Coat the nozzles and trim in VMC Brass.
Shading
Skins get a wash of the original color mixed with a touch of GAFA Raw Umber and VMC Matte Medium. The clothing is left alone; it's dark enough and gets highlighting only. The leggings, gloves, and hat get a wash of the original color mixed with VMC Black Grey. Leathers and wood get washed in a mix of GAFA Raw Umber, VMC Matte Medium, and water. The silver metals get a wash of GAFA Payne's Grey and VMC Matte Medium. After it dries, following with a deep recess wash of P3 Armor Wash. The brass metals get a wash of GAFA Raw Umber and VMC Matte Medium. After it dries, follow with a deep recess wash of with a touch of P3 Armor Wash.
Highlighting
First highlight is to clean up areas of spillage and error from the washes, and do general broad highlights, using the base coat colors. Further highlights were:
Gloves - base coat mixed with RMS Leather White, progress up to a 50/50 mix.
Blues - base coat mixed with RMS Leather White, progress up to a 50/50 mix.
Blacks - base coat mixed with RMS Leather White, progress up to a deep grey.
Wood - base coat mixed with a touch of VGC Bonewhite.
Metals - base coat mixed with VMC Silver, especially on the bronze areas, allow original color to show.
Skin - base coat mixed with RMS Creamy Ivory. Lips, chin, nose, ears, elbows and ankles use the same mix but with added in VMC Beige Red. This added a lot of warmth and character to the models.
Detailing
Eyes - RMS Sunlight Yellow
Teeth & nails - RMS Creamy Ivory
Clean up any untidy spots, errors, what not.
Add black/brown lining between areas that seem a little indistinct.
Basing
As per my Circle Orboros standard basing technique. I've found painting the lip of the base black at some point during painting - this time during highlighting - helped provide a solid base and covered the white between the lip and the flat inner portion nicely.
Well, I promised pictures... I didn't promise they'd be good though. :-/


Total time: ~10 hours
 Base Coat
Start with a base of VMC Green Ochre on the skins. Shirts, pants, and handkerchief are a combination of VMC Black Grey and RMS Deep Ocean, alternating which colors are where on each model (e.g. pants and handkercheif are blue on one model, black-grey on the other). Cover the leggings, gloves, and hat in a coat of VMC London Grey. Leather bags and straps are a 50/50 blend of VGC Beasty Brown and RMS Dark Shadow (to cut the red tone). Woods on the bellows pump is a 50/50 mix of VGC Charred Brown and RMS Dark Shadow (again to cut the red tone). Cover the tubes and pipes, and the inside of the tank, in VMC Oily Steel. Coat the nozzles and trim in VMC Brass.
Shading
Skins get a wash of the original color mixed with a touch of GAFA Raw Umber and VMC Matte Medium. The clothing is left alone; it's dark enough and gets highlighting only. The leggings, gloves, and hat get a wash of the original color mixed with VMC Black Grey. Leathers and wood get washed in a mix of GAFA Raw Umber, VMC Matte Medium, and water. The silver metals get a wash of GAFA Payne's Grey and VMC Matte Medium. After it dries, following with a deep recess wash of P3 Armor Wash. The brass metals get a wash of GAFA Raw Umber and VMC Matte Medium. After it dries, follow with a deep recess wash of with a touch of P3 Armor Wash.
Highlighting
First highlight is to clean up areas of spillage and error from the washes, and do general broad highlights, using the base coat colors. Further highlights were:
Gloves - base coat mixed with RMS Leather White, progress up to a 50/50 mix.
Blues - base coat mixed with RMS Leather White, progress up to a 50/50 mix.
Blacks - base coat mixed with RMS Leather White, progress up to a deep grey.
Wood - base coat mixed with a touch of VGC Bonewhite.
Metals - base coat mixed with VMC Silver, especially on the bronze areas, allow original color to show.
Skin - base coat mixed with RMS Creamy Ivory. Lips, chin, nose, ears, elbows and ankles use the same mix but with added in VMC Beige Red. This added a lot of warmth and character to the models.
Detailing
Eyes - RMS Sunlight Yellow
Teeth & nails - RMS Creamy Ivory
Clean up any untidy spots, errors, what not.
Add black/brown lining between areas that seem a little indistinct.
Basing
As per my Circle Orboros standard basing technique. I've found painting the lip of the base black at some point during painting - this time during highlighting - helped provide a solid base and covered the white between the lip and the flat inner portion nicely.
Well, I promised pictures... I didn't promise they'd be good though. :-/


Total time: ~10 hours
Friday, January 9, 2009
Well, you wonder why I always dress in black...
Well, here's another one of those "scheme posts". If you recall, here's my plan for my current factions.
- Summer's Trial (Cygnar) - Classic blues/brass w/ summer mix bases. Some whites, bronzes, golds, silvers. Basic classic studio scheme.
- Spring's Malice (Circle Orboros) - Dark/bronzes w/ turquoise glow & slushy bases. Very dark grays & greens. Some deep wine reds for cloaks.
- Winter's Wrath (Trollbloods) - Cooler classic blues/gold w/ snowy bases and a lot of yellow grasses. Look at Masonic tartans.
- Autumn's Vengeance (Highborn Covenant) - Blacks, purples, oranges/gold w/ autumn bases. Coherent with Cygnar. A black Cygnar.
Tuesday, October 7, 2008
Group shot
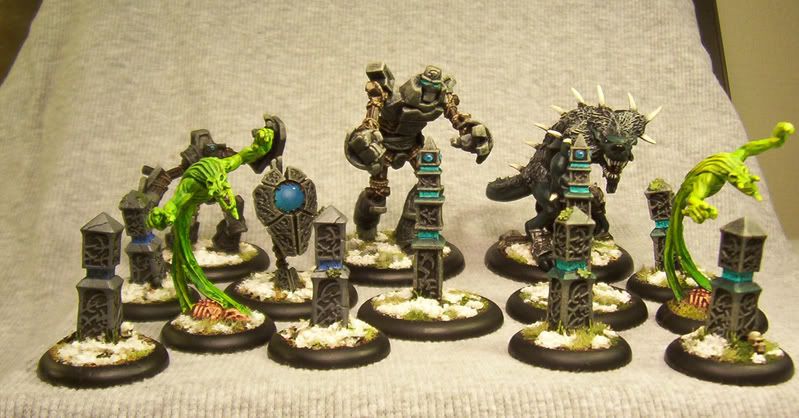
Here's the mass of Circle/Minion models I have completed to date. I just love group photos. This one's a little crowded, but still makes me feel good.
I think this may mark the end of my Circle painting for a bit. Maybe finish up some Cryx and Cygnar stuff now...

I think this may mark the end of my Circle painting for a bit. Maybe finish up some Cryx and Cygnar stuff now...
Wednesday, September 24, 2008
Woldwarden Step-by-Step
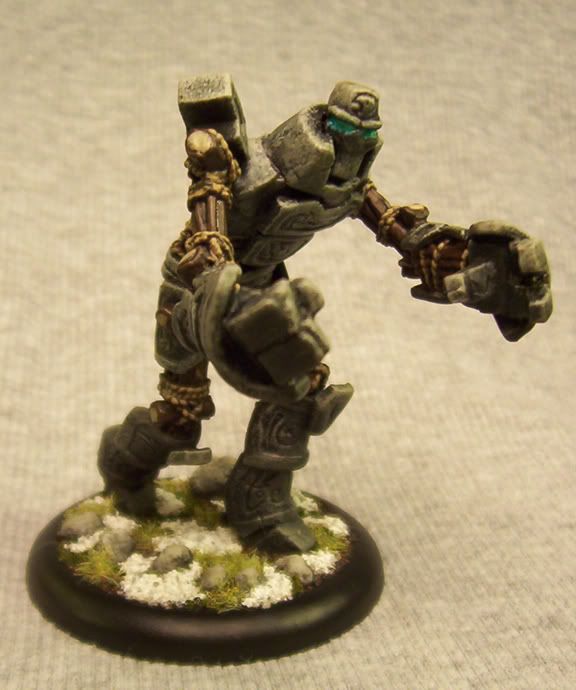
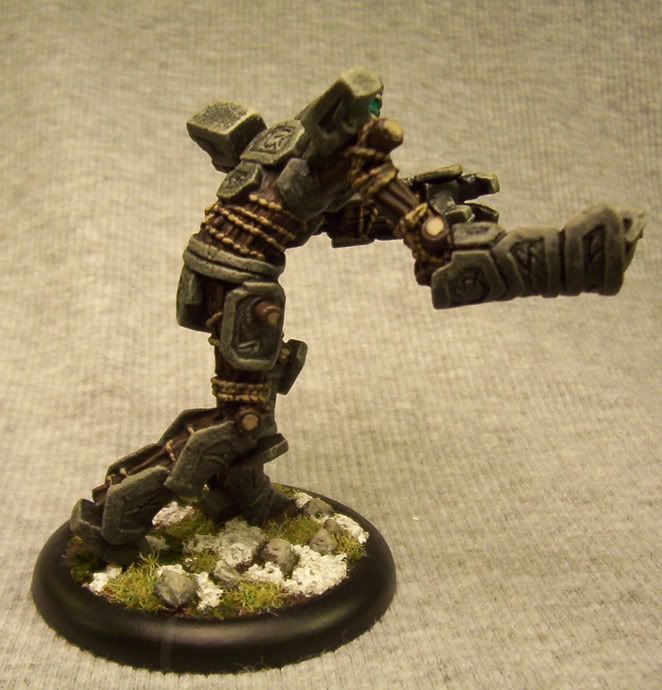
Took on the Woldwarden next. Made some changes from the Woldwatcher experiences and went ahead with the sponge painting approach again.
Pics, as promised.

Second angle
Third angle
Fourth angle
- Base coat all stone areas black (this guy was primed white - mistake). White out the "eyes" and some of the surrounding area. The sponging will help delineate the appropriate eye area.
- Sponge or stipple (in tight areas) in consecutive, diminishing layers - VMC Black Grey, P3 Ironhull Gray, P3 Cryx Bane Base, P3 Cryx Bane Highlight, P3 Trollblood Highlight. Careful to leave recessed areas black.
- Paint all the wood and ropes with a 50/50 mix of VGC Charred Brown and RMS Dark Shadow. The Dark Shadow kills a lot of the red in the Charred Brown, making for a nice even brown with a suggestion of gray tones.
- Paint all the wood "flesh" or exposed inner parts with a 5:1 mix of VGC Khaki and the mix for the rest of the wood. This deepens the Khaki and makes for a nice base.
- Paint all the ropes with a 50/50 mix of VGC Khaki and VGC Earth. Careful to keep this on the ropes and knots only. Leave some dark recesses as appropriate.
- Wash entire wood/rope areas with a mix of VMC Matte Medium, water, P3 Armor Wash, and VMC German Camo Black Brown, in equal portions.
- Highlight wood and ropes with their original colors. Highlight up more with adding VGC Khaki as appropriate.
- Wash the "eyes" with P3 Turquoise Ink. Leave some whiter areas in the middle; focus on edges.
- Base per Circle Basing article below.
Pics, as promised.
Second angle

Third angle

Fourth angle
Sunday, September 21, 2008
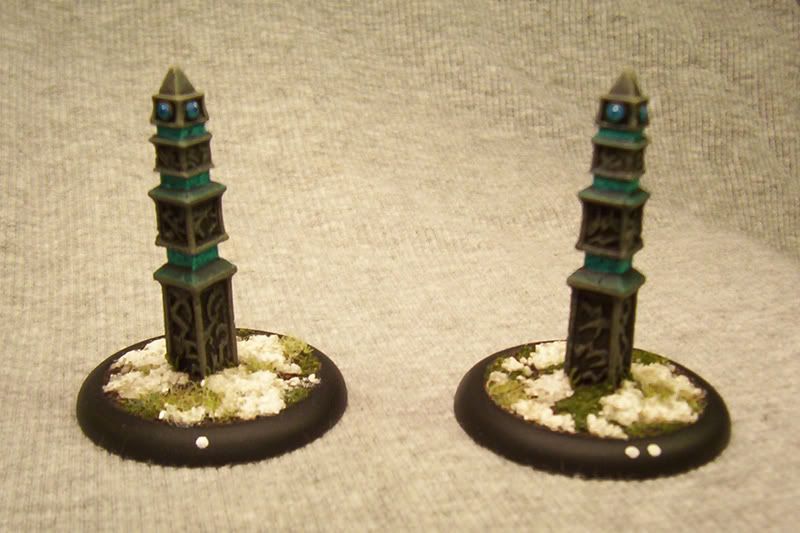
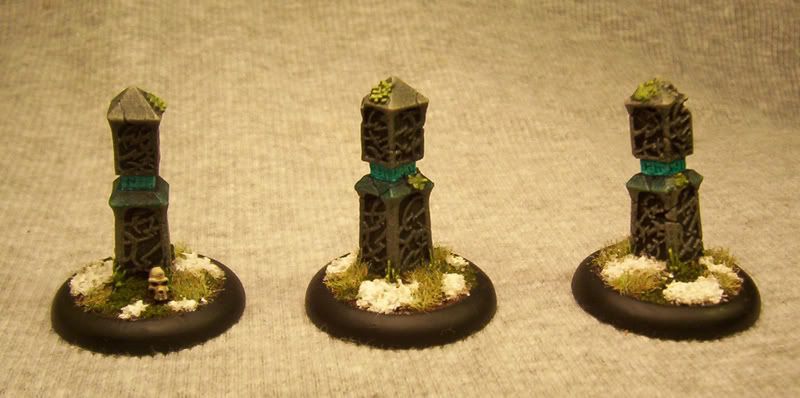
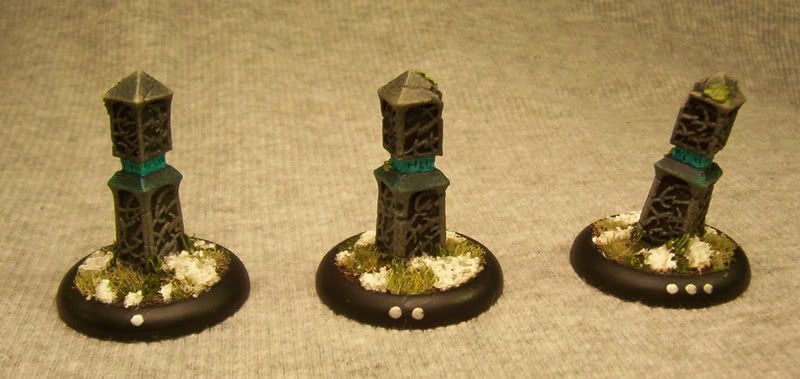
Bones & Leaves
Some new techniques I stumbled upon or modified from other sources that I should document quick. First up, old bones; the kind sitting on the ground waiting...
Old bones
1. Base coat with VGC Bonewhite.
2. Wash with a watered mix of VGC Sepia Ink & VMC US Field Drab.
3. Glaze with a very light layer of VMC Brown Violet (actually a greenish color).
4. Highlight back up with VGC Bonewhite.
5. Pick out teeth with RMS Linen White.
And every once in a while, PP sculpts a model with leaves or grass. These can be hard to paint to match whatever terrain goes on the base. But I came up with this...
Leaves in Pewter
1. Base coast with VMC Brown Violet.
2. Highlight with P3 Ordic Olive
3. Consequetive highlights with P3 Ordic Olive and P3 Moldy Ochre mixed.
4. Last highlight should have a little more Moldy Ochre than you think you need; it really pops!
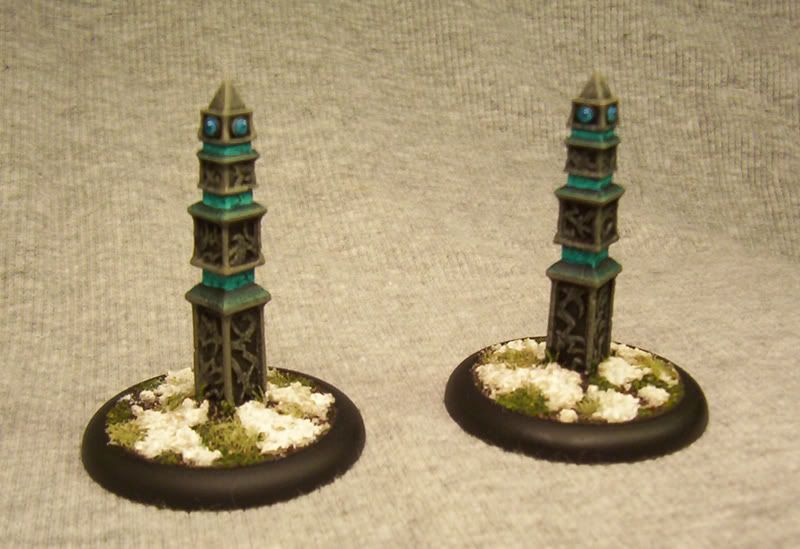
That's it. Both of the techniques were developed on my latest Shifting Stones. Should have pictures... eventually.
Sentry Stones

Second angle
Shifting Stones

Second angle
Old bones
1. Base coat with VGC Bonewhite.
2. Wash with a watered mix of VGC Sepia Ink & VMC US Field Drab.
3. Glaze with a very light layer of VMC Brown Violet (actually a greenish color).
4. Highlight back up with VGC Bonewhite.
5. Pick out teeth with RMS Linen White.
And every once in a while, PP sculpts a model with leaves or grass. These can be hard to paint to match whatever terrain goes on the base. But I came up with this...
Leaves in Pewter
1. Base coast with VMC Brown Violet.
2. Highlight with P3 Ordic Olive
3. Consequetive highlights with P3 Ordic Olive and P3 Moldy Ochre mixed.
4. Last highlight should have a little more Moldy Ochre than you think you need; it really pops!
That's it. Both of the techniques were developed on my latest Shifting Stones. Should have pictures... eventually.
Sentry Stones
Second angle
Shifting Stones
Second angle
Tuesday, September 9, 2008
Feralgeist #2 and new Trollbloods basing
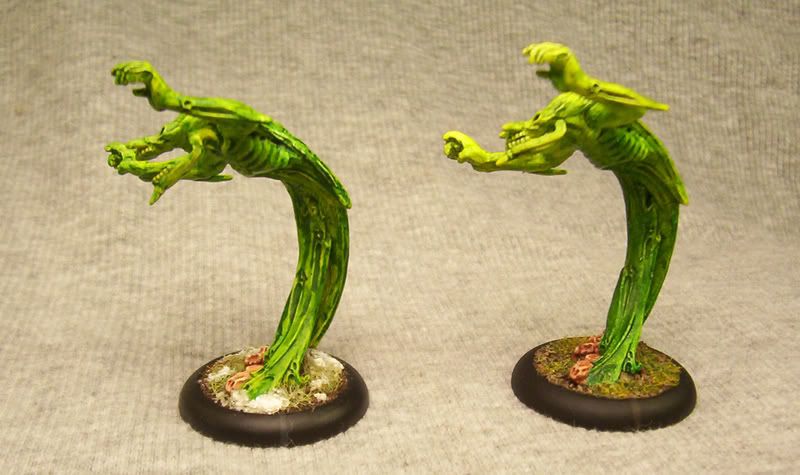
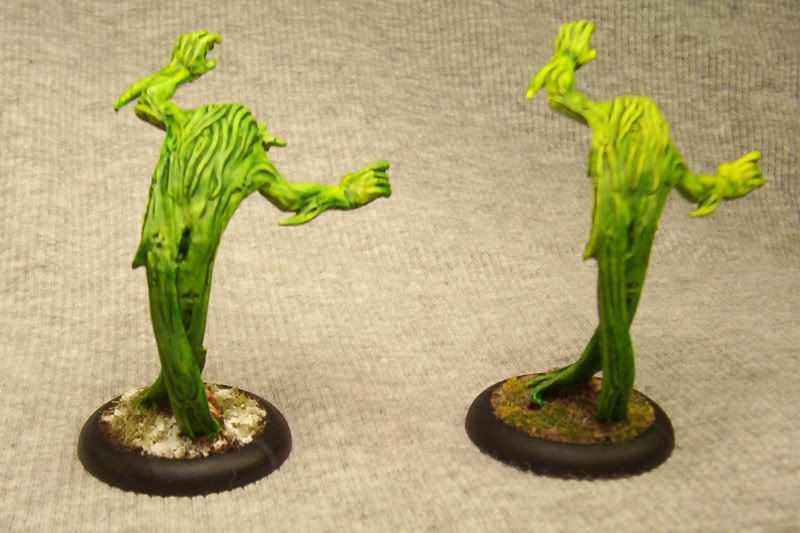
Did another "accidental" Feralgeist. Did the same process, but started with more of a 50/50 GW Dark Green and Yellow ink mix near the bottom and slowly transitioned into a mostly yellow ink near the top. Actually, did the top 1/3 and the bottom 1/3 and then transitioned between. Did the bones the same as before. The base was a bit different. Followed the Cygnar base process, but after the ballast dried, I deviated...

Second angle
Third angle
- Dry brush VGC Earth on the turf
- Dry brush a layer of VGC Earth and VGC Khaki mixed on the high areas
- Dry brush straight VGC Khaki near the tips of stuff
- Paint on front arc markings with VMC German Camo Brown Black
- Glue on smallish areas of my custom Summer Mix flock
- Glue on some areas around and above (where possible) of straight GF9 Summer Blend
Second angle

Third angle
Wednesday, September 3, 2008
Front arc markings...
Just to keep it all straight and organized, I'm writing my front arc markings color choices here. The goal is to have colors that are dark, subtle and easily overlooked when simply viewing the model, but easy enough to see in play, while also helping to tie the army together in a cohesive style.
Minions will use the color of the faction they'll most likely see time with. For example, my first Feralgeist went with the Circle Orboros front arc markings. My second one will go with Trollbloods. The colors are subtle enough, and faint enough, to not matter. Being painted's the most important part. Yay!
- Cygnar - VGC Imperial Blue
- Circle Orboros - VMC Black Gray
- Cryx - VGC Scurf Green
- Trollbloods - VMC German Camo Black Brown
- Highborn Covenant - VGC Royal Purple
- Legion of Everblight - RMS Walnut Brown
Minions will use the color of the faction they'll most likely see time with. For example, my first Feralgeist went with the Circle Orboros front arc markings. My second one will go with Trollbloods. The colors are subtle enough, and faint enough, to not matter. Being painted's the most important part. Yay!
Monday, September 1, 2008
Feralgeist: A Bit of Random Painting
I somehow just started this guy. After buying some P3 Turquoise Ink, I realized I could get a cool color if I mixed some of my preexisting inks. With my Feralgeist sitting there, primed and waiting, I went to town. Here's what I did...
Voila! He looks neat. His gloss coat is drying as I write this. He'll get dull coated tomorrow and maybe I'll get some pictures. Overall, took about two hours; should knock out the second one quick while the method is still fresh in my mind.
Good night, all!
- Cover the entire spirit portion of the model with a 50/50 mix of GW Dark Green Ink and GW Yellow Ink. Mixing in some Vallejo Matte Medium on the subsequent layers, I was able to darken the effect.*
- Paint the carcass with a solid base coat of VGC Bone White
- Wash the carcass with a mix of VGC Dark Fleshtone and water, with a drop of VMC US Field Drab, to cut the red tone. This gives an appoximation of P3 Idrian Flesh, as recommended for this model in NQ #16.
- Highlight the bones' natural edges with RMS Creamy Ivory. This approximates the 50/50 mix of P3 Menoth White Highlight and 'Jack Bone, again as recommended in NQ #16.
- Wash the entire carcass with a blend of one part GW Red Ink, two parts GW Brown Ink, and lots of water. I added some more red ink to the mix for a little extra gore. Worked well.
- Re-highlight the bones' natural edges as in step 4, but keep it subtle.
- Base as Circle Bases tutorial below - this guy will work most often with my Circle. I skipped the front arc markings since he has no melee weapon and will often be used in other factions; the colors won't clash that way. I also skipped the leaves, since his usable base area is kind of limited.
Voila! He looks neat. His gloss coat is drying as I write this. He'll get dull coated tomorrow and maybe I'll get some pictures. Overall, took about two hours; should knock out the second one quick while the method is still fresh in my mind.
Good night, all!
Subscribe to:
Posts (Atom)