First, I cut a 4" x 0.75" piece of 1mm sheet styrene to serve as the legal-sized base (per both Prime Mk2 and Primal Mk2). I then started making the rock wall. I wanted it vertical, of course, but layered from the side - to look like it was rising up from the ground as the Stonesoul cast his spell. So, first I made a long central wall of rocks, leaving space on either side. I used sculpting tools to create flat surfaces, ledges, and striations my fingers couldn't manage. Then, remembering how much Super Sculpey stinks when you bake it, I opted to boil it. Worked like a charm! About two minutes in boiling water and it was set solid. Then I added another row of rocks to one side, following the same procedure and covering up areas I didn't feel looked that great in the first row. Boiled that side (only one minute this time) and then did the same to side two (boiled closer to two minutes here). Then I did some gap filling with liquid green stuff and Gorilla Glue (the styrene had come away from the rocks here and there), carved some starker facets around the surfaces, and filed areas to be sharper. The result was three rough rows of nicely-faceted rocks making a game-legal wall.
My inspiration to paint comes in fits and starts, to be sure. In fact, I haven't painted much of anything this year, and nothing since I moved in February. As inspiration would have it, before priming, I had showed my wife this flesh- and green-colored rock wall, and she said, "I think I'd like to see it when you get it painted." Well, that planted the seed. So I set about priming the rock wall. I also primed my Fulcrum and Baldur2 while I was at it, using my trusty Duplicolor Sandable Black automotive primer. I love this stuff! Can't recommend it enough. I was especially struck with how smoothly it goes on after months of not using it. I've been using some cheap Wal-mart gray primer to mass-prime my Dark Elves (it's good stuff, too, just a little trickier - can't be beat for the price when you have so many models to prime).
After the wall was dry I went about painting it, following the scheme I had developed almost four years ago for my Circle constructs. I figure the wall should match, right? For you readers, I followed my own blog post on painting my Woldwarden, since he represented the most recent iteration of the scheme. Within an hour or so, I had it complete. However, I wasn't totally happy with it...
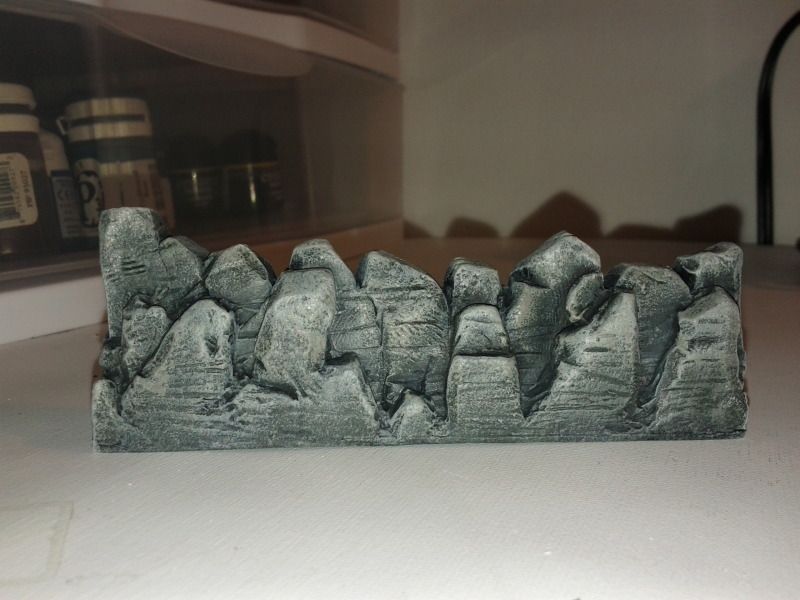
So, I texted a picture or two to my friend Ray. He's a talented and extremely prolific painter who sends me pics all the time, asking for advice on the use and placement of colors. I figured I may as well get him to return the favor. He agreed that it looked good, but needed a little something else. He immediately advised that I should add a light highlight of GW Rotten Flesh. Well, I conveniently had the VGC equivalent called Dead Flesh handy and snatched it up. I had some serious doubts though. This stuff looks pretty green. But Ray assured me it would work, that he'd been reading a bunch of stuff on color theory lately, and knew it would look great. I'll let you decide... here's the before picture, finished up to the point of my other completed Circle constructs.
Then I took a deep breath and went to work with the VGC Dead Flesh. Here's the result, this time with both front and back photos.
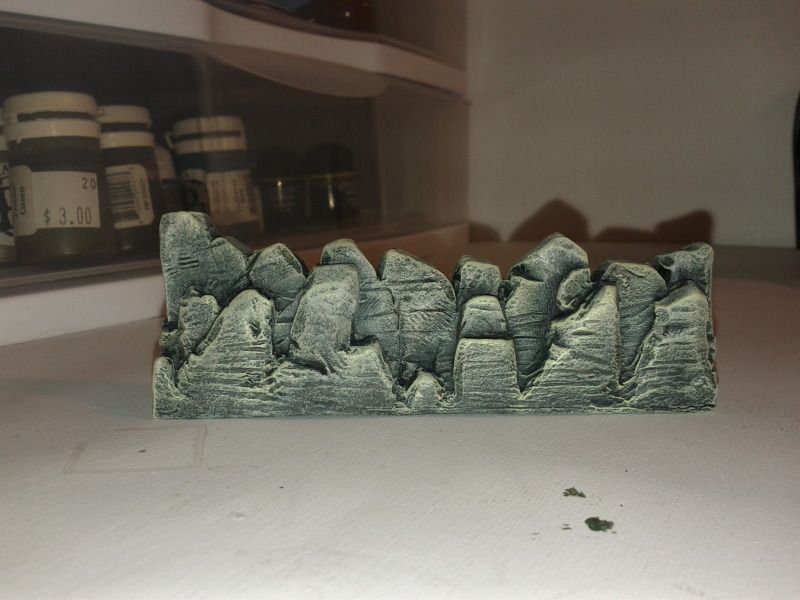
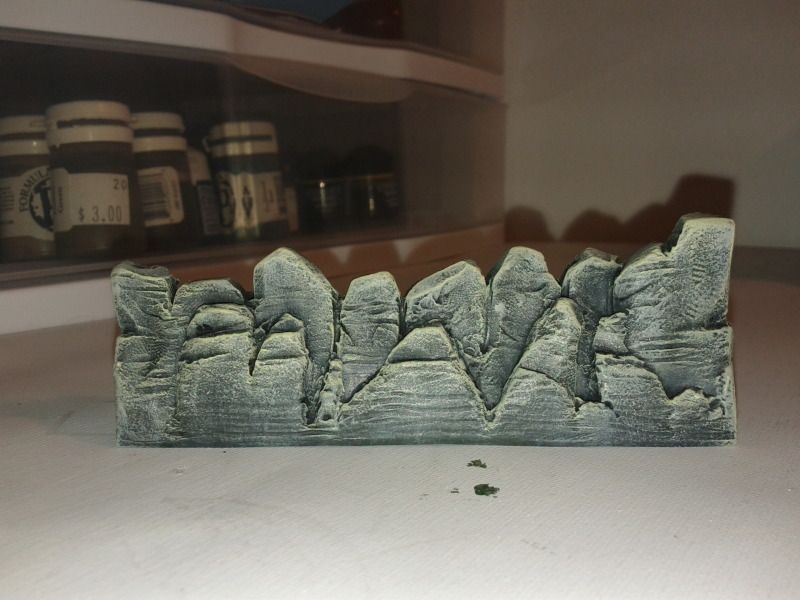
Tomorrow, the piece will get my usual layers of Krylon gloss varnish followed by matter varnish. Sorry if the less-than-ideal phone pics make the difference hard to see. But rest assured, in person, the added layer makes this wall really pop! It gives a depth to the over all image I was trying to convey, as well as a sense of scale that wasn't quite present before. It looks more... real... for lack of a better term. It also looks somewhat arcane, like it's truly spell-driven. Ok, I'm a dork, I know - but I can't help but be excited!
Either way, I feel inspired! I want to paint my Celestial Fulcrum next. If this wall pops, then this method will certainly make that Fulcrum explode, baby!
Let me know what you think! I invited Ray to come check out my blog. If he's reading this, thanks man! I love learning new techniques when I paint. It's a real inspiration and it hasn't happened in a long time.
No comments:
Post a Comment